Set Appointment #
To set an appointment with the selected lead, you will first click the “Set Appointment” button in the Actions Panel that is in the right sidebar as pictured below.
![]()
Once clicked, it will open the appointment modal pop up.
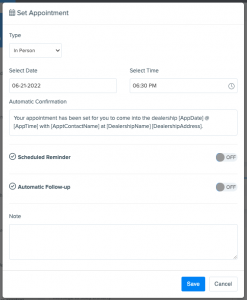
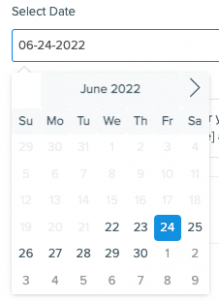
The first thing you will do is select the desired date from the date calendar dropdown. The calendar will appear when you click the “Select Date” field.
Next you will set the time. Click the “Select Time” field to show the Time Selector dropdown. Then using this dropdown, either type the time into the selected boxes or use the arrows. Click off the box to save the selected time.

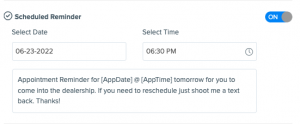
Schedule Reminder #
The next thing you need to do is schedule an appointment reminder to go out, so click the toggle on the right so that it turns blue.
This automatically set’s the reminder for 24 hours before the appointment time. If the appointment is scheduled for tomorrow, follow the same method for the date and time as above and change the time to send tomorrow 3 hours before the appointment. If it’s an early morning appointment then set it 1 hour before the appointment.
Automatic Follow Up #
Once the reminder has been set, the next thing you need to do is schedule an Automatic Follow Up to go out, so click the toggle on the right so that it turns blue.
You do not need to change any date or time here

Note #
If you need to leave a note about the customer that will send to the CRM and Lead Sheet, you can enter that here before setting the appointment.
Set the Appointment #
BEFORE YOU SET THE APPOINTMENT, first make sure that the Appointment and Reminder Times are correct. Click each field to make sure the text matches the dropdown boxes. Once that is confirmed, click the blue “Save” button to set the appointment.
If you are looking for how to reschedule appointments, you can find that here.


